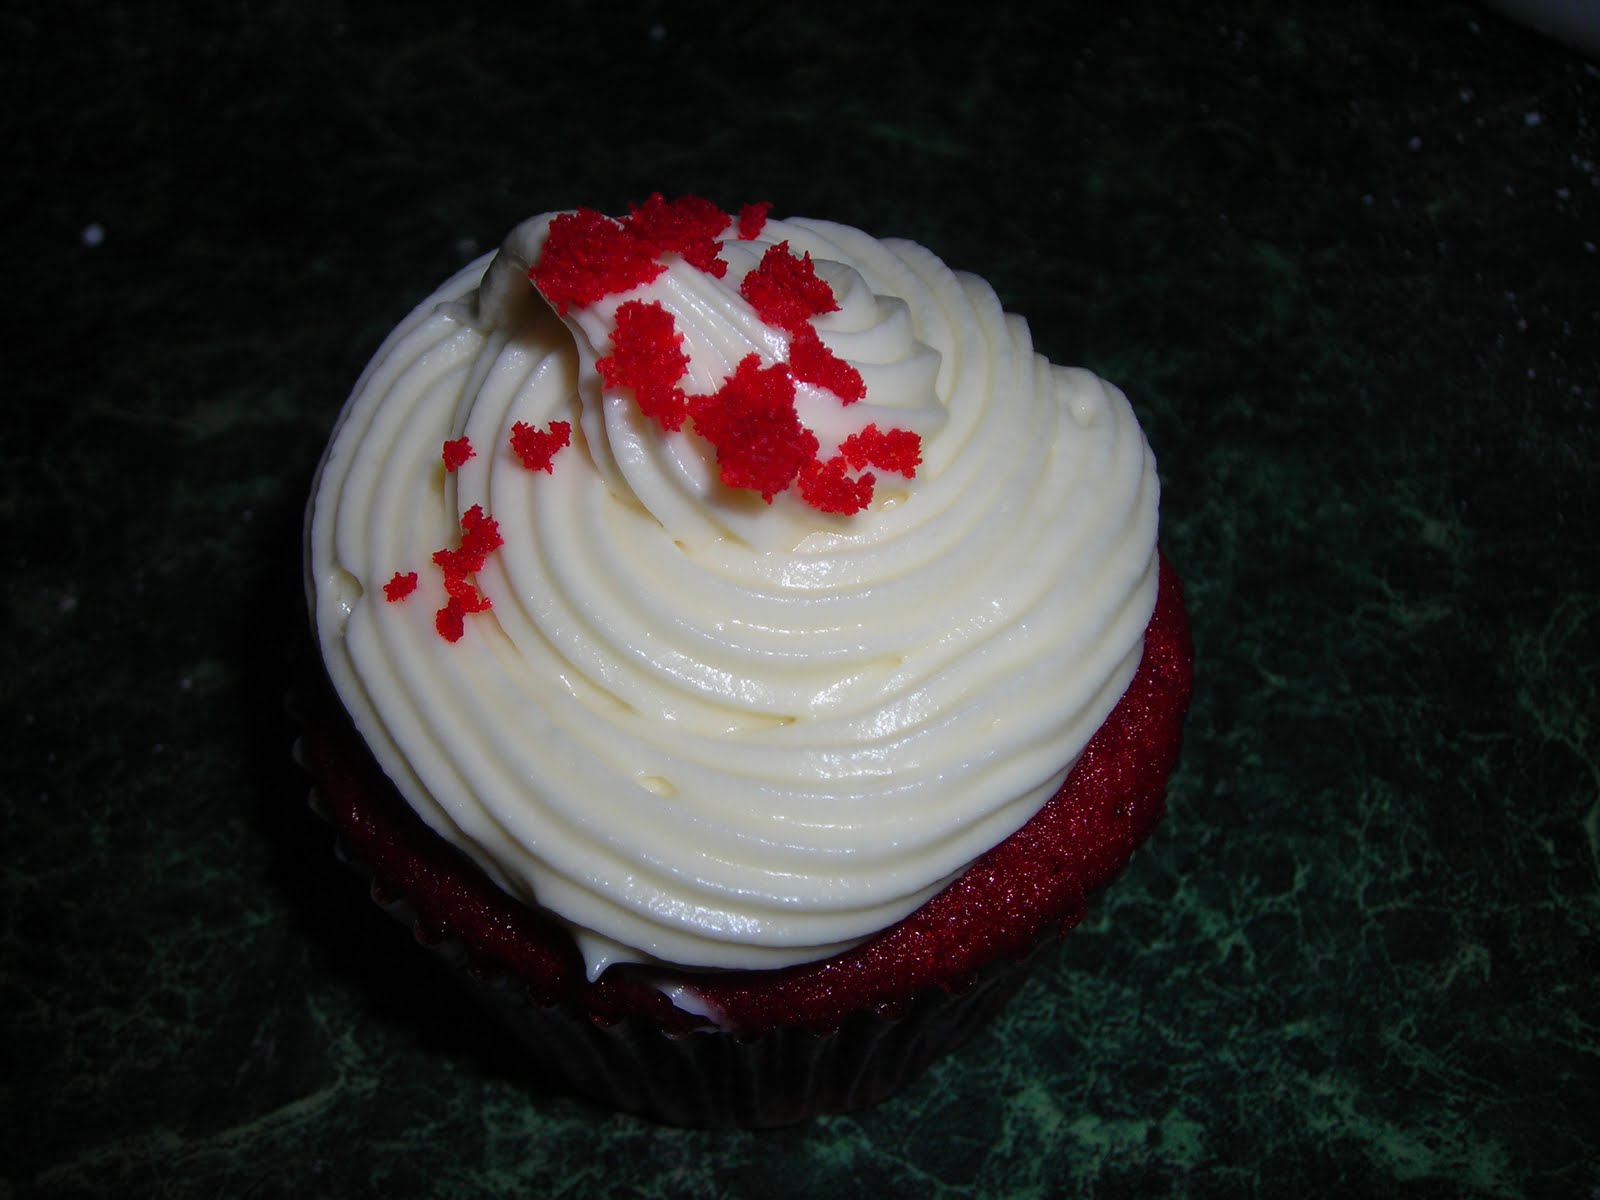
Sunday, November 29, 2009

Chocolate Peanut Butter Cup Cupcakes


Yum!

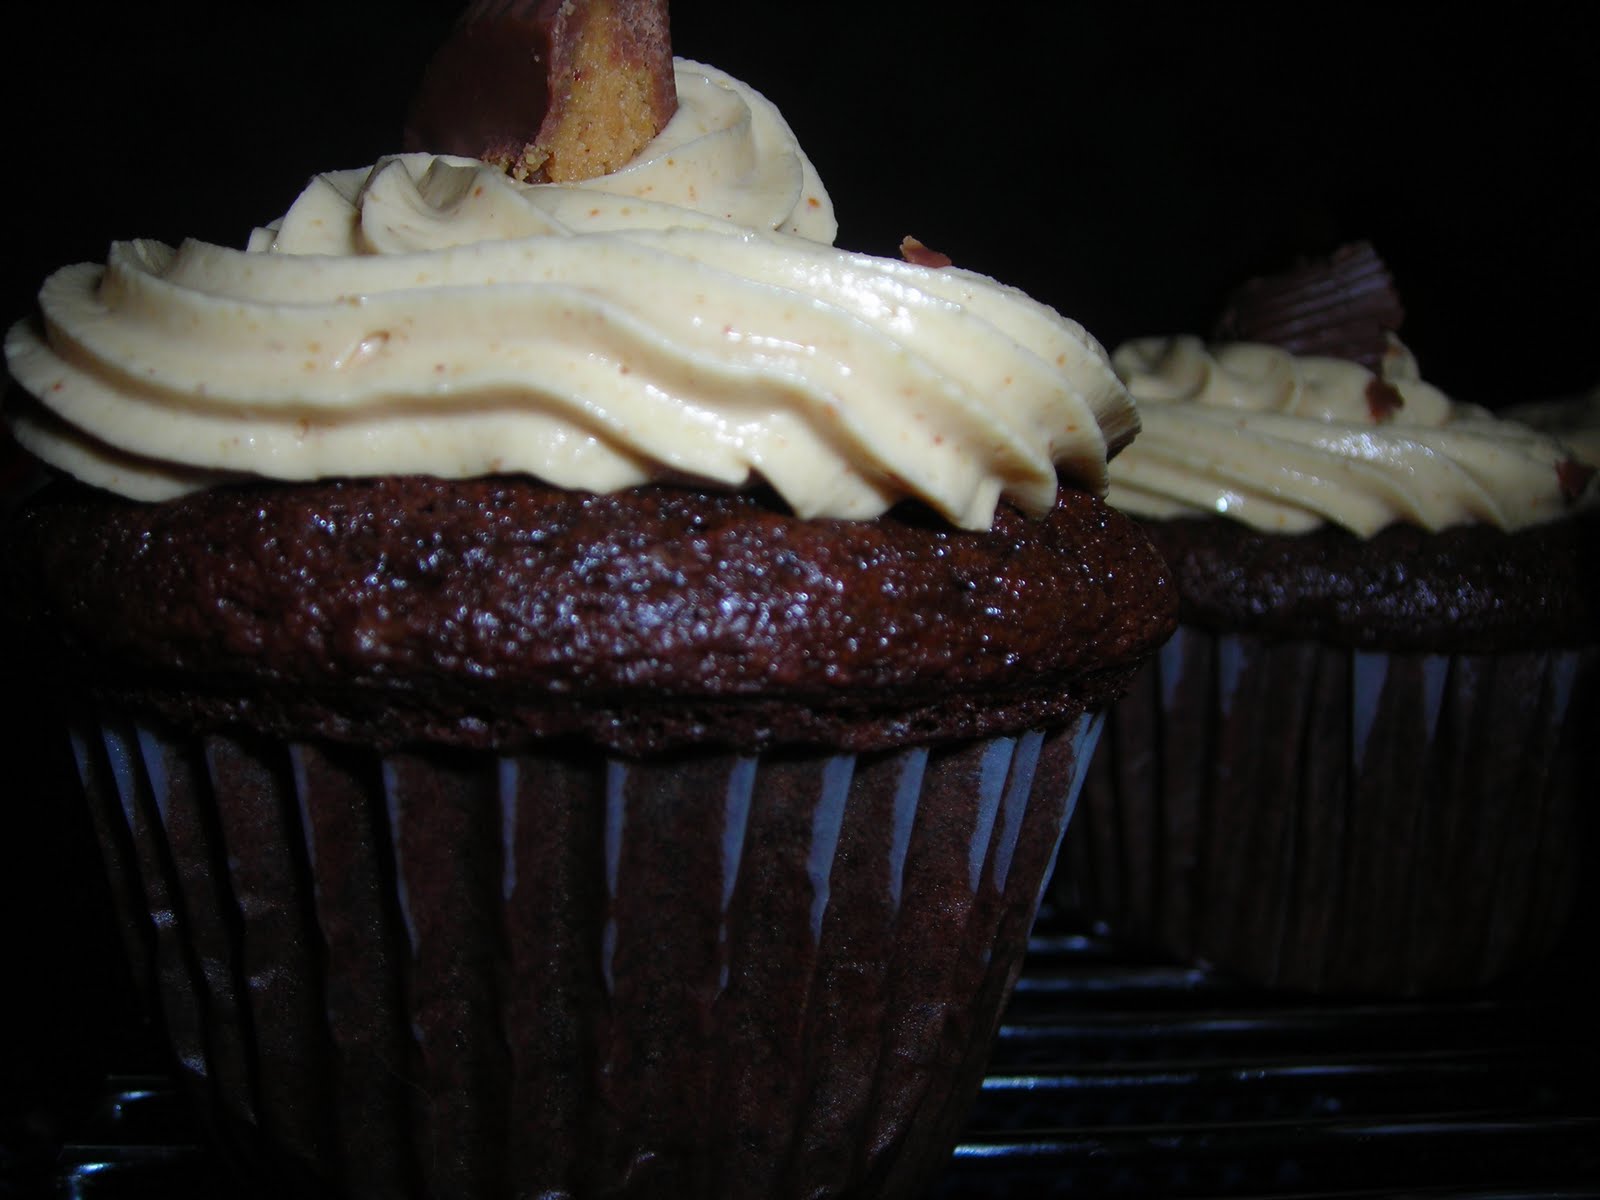
I have quite a few friends who enjoy the chocolate and the peanut butter. They go so well together! So, a few weeks ago I was visiting a friend and was barred from entering their (lovely) residence without something involving chocolate & peanut butter. I had defaulted on the previous two visits, so I wanted to whip up something amazing.

I scoured the internet for a variety of chocolate peanut butter cakes, cupcakes, etc. However, I decided to fall back to my trusty chocolate cupcake recipe courtesy of the America's Test Kitchen Family Cookbook. And, since they haven't failed me yet, I referred again to my America's Test Kitchen Cookbook for a peanut butter frosting.

This is a rich, chocolatey, moist cupcake. Thus solving the problem I have with most cupcakes - that they are dry and tasteless. I hope you enjoy it was much as I do!

DARK CHOCOLATE CUPCAKES

Makes: 24 cupcakes (Medium)
Prep Time: 10 minutes
Total Time: 45 minutes (plus cooling time)

INGREDIENTS:
16 TBS (2 sticks) unsalted butter, cut into 16 pieces
4 oz bittersweet chocolate, chopped
1 cup Dutch-processed cocoa powder
1 1/2 cups all-purpose flour
1 1/2 tsp baking powder
1 tsp baking soda
1 tsp salt
4 large eggs, at room temperature
2 tsp vailla extract
1 1/2 cups sugar
1 cup sour cream

1. Microwave the butter, chocolate, and cocoa together, whisking often, until melted and smooth - 1 to 3 minutes. Set aside to cool until just warm to the touch.

2. Meanwhile, adjust an oven rack to the middle position and heat the oven to 350 degrees. Line two muffin pans with cupcake liners. Whisk the flour, baking powder, baking soda, and salt together in a large bowl and set aside.

3. Whisk the eggs and vanilla together in a large bowl. Slowly whisk the sugar until combined. Whisk in the cooled chocolate mixture.

4. Sift one third of the flour mixture over the batter, then whisk it in. Whisk in the sour cream. Sift the remaing flour mixture over the batter and whisk until completely incorporated (the batter will be REALLY thick).

5. Fill the cupcake liners about 2/3 full. I like to use an ice cream scoop to do this! Bake until a wooden skewer inserted into the center of a cupcake comes out with a few crumbs attached, 18 to 22 minutes, rotating the pans halfway through baking.

6. Let the cupcakes cool in the pans on wire racks for 5 minutes. Remove from the pans and let cool completely on the racks before frosting, about 1 hour.

QUICK PEANUT BUTTER BUTTERCREAM FROSTING

Makes: 3 Cups

Total Time: 10 minutes

INGREDIENTS:
2 TBS heavy cream
1 tsp vanilla extract
pinch of salt
2 sticks unsalted butter, softened
1 1/2 cups confectioners sugar
1 cup creamy peanut butter (Do not use old-fashioned or natural peanut butter in this recipe!)

1. Stir the cream, vanilla, and salt together in a small bowl until the salt dissolves.

2. Beat the butter with an electric mixture on medium-high speed until smooth, 30 to 60 seconds.

3. Reduce the speed to medium-low, slowly add the confectioners' sugar & peanut butter, and beat until smooth, 2 to 5 minutes.

4. Beat in the cream mixture. Increase the speed to medium-high and beat until the mixture is light and fluffy, 4 to 8 minutes.

This frosting can be made up to 2 days ahead and refrigerated...if it lasts that long!

Per usual, I also used the butter cream to fill these cupcakes and topped them with 1/4 of a peanut butter cup.

Enjoy!!


Thursday, November 26, 2009

Thanksgiving pies - Pecan & Pumpkin


A few weeks ago I decided to face my fear of pie dough. There have been certain baked items over the years that I have found a little intimidating, and really, the boxed ones are pretty good. First were brownies (I'll post my brownie recipe some day...), which I never found a good recipe. Then one day I did - so far superior to the boxed mix!

The other intimidating item was pie crust. I mean, Pillsbury makes a mean refrigerated version - you roll it out, it's delicious, easy. EVERYONE (including the folks on the Foodnetwork) say to use it. Why shouldn't I listen to the food network? But I felt like it was my dirty little secret that I, a baker, didn't make my own pie crust. So I rolled up my sleeves and made a pie crust. It was a little scary but a lot delicious, and really...not that much more work than going to the store and unrolling the boxed crust!

This year for Thanksgiving I decided to make EVERYTHING from scratch in the regards to pie. So, you've got the pie crust, you've got the pecan pie filling AND as a special bonus, you've got the home-made pumpkin pie made from an honest to goodness pumpkin!

Pumpkin Pie w/Puree

Yields: 1-10" pie or 2-9" pies
Prep time for puree: about 5 minutes
Cook time for puree: 15mins - 1 hour, depending on method chosen
Prep time for pie: about 10 minutes

Cook time for pie: 1 hour to 1 hour 15 minutes


The journey begins...with the pumpkin. Let's start with turning the pumpkin into pumpkin puree. Now, I got this recipe from this website, which has a lot of other fabulous recipe on making things from scratch.
Ingredients & tools for making pumpkin puree:
- A sharp, large, knife (for cutting the pumpkin)
- An ice cream scoop or large spoon

- A large roasting pan (if roasting, or microwaveable bowl or large pot if steaming)
- a pie pumpkin

Making Pumpkin Puree (to use in place of canned pumpkin)
Pie pumpkins are the smaller, sweeter variety of pumpkin. You do not want to get a big
jack-o-lantern pumpkin. You want a pumpkin that's going to be about 8" in diameter. It's like selecting any squash, look for one that is firm, no bruises or soft spots, and has a good orange color.


Now to prepare the pumpkin for cooking:
  1. Wash the exterior of the pumpkin in cool or warm water. No soap is necessary
  2. Cut the pumpkin in half - be careful not to slip and cut yourself!
  3. Scrape out the insides. Get ALL the gooy stringy stuff out. A heavy ice cream scoop or large spoon works. You can save the seeds and either plant them to make more pumpkins for delicious pies next year or you can roast them.
  4. Cook the pumpkin. Okay...so, there are a variety of ways that you can take care of these. You can steam it in the microwave or on the stove, or you can roast it. I chose to roast it hoping to maximize the pumpkin-y goodness. The most time efficient way is to go ahead and microwave it. I'll outline all your options, so you can choose (these are listed below)
  5. Once the pumpkin is cooked and soft, scoop out the cooked pumpkin. Do this using a broad, smooth spoon - a tablespoon will work great - and the pumpkin will separate quite easily if it is cooked enough. Put it into a big bowl.
  6. Puree the pumpkin into a nice, smooth consistency. Since I was at home, I got to use my Mom's lovely immersion blender. You can also use a regular blender or I bet food processor. In a pinch, use a hand mixer - it will just take a little longer.
  7. That's it - you have pureed pumpkin!
To Roast your Pumpkin:
Preheat the oven to 350 degrees F. Put the prepared pumpkin in a roasting pan, flesh side down
. Add enough water so it's just touching the pumpkin - you don't want to let the pumpkin dry out. Let it sit in there for 45 minutes to an hour, checking periodically by sticking it with a fork to see if it's soft.

Microwaving the Pumpkin:
Remove the stem and put the pumpkin in a microwaveable bowl. You may need to cut the pumpkin furter to make it fit, but remember: the fewer the number of pieces, the easier it will be to scoop out afterwards. Put a couple of inches of water in the bowl, cover it, and put it in the microwave. Cook for about 15 minutes on high and check to see if it's soft. Repeat in smaller increments of time until it is soft enough to scoop the innards out. Normally it takes 20 or 30
minutes in total.

Steaming the Pumpkin on the stove top:
Place your steaming basket or grid in the bottom of a large pot. Add enough water so it woun't bol dry in 20 minutes, and yet is not so high that the pumpkin is touching the water level. You may need to add more water during the cooking. Add the pumpkin and get the steamer going. The cooking time is only between 8 and 12 minutes, depending on the range. The pumpkin should literally fall off the skin.


Okay...so now you've got your pumpkin puree. The hardest part is done. You can stop here and refrigerate it over night, if you want. If you do this some of the liquid may separate and I would suggest dabbing that off before moving on to making the pie.

Next: make the pie crust (I'll go over the pie crust below both of these filling recipes).

You've got the pie crust, you've got the pumpkin puree, now time for the pie!

Pumpkin pie ingredients:
  • 1 cup sugar
  • 1 1/2 tsp ground cinnamon
  • 1 tsp ground cloves
  • 1 tsp ground allspice
  • 1/2 tsp ground ginger
  • 1/2 tsp salt (optional - I didn't use any)
  • dash of nutmeg
  • 4 large eggs
  • 3 cups pumpkin puree (this is about the amount made by an 8" pumpkin, FYI)
  • 1 1/2 cans (12 oz. each) of evaporated milk (low-fat versions okay)
Preheat the oven to 400 degrees F.

Mix all the ingredients together well. A hand blender or mixer will be helpful. The filling is a little runny, be warned.

Next, put your pie crust in your pie dish. This recipe is good for either 2 - 9" pumpkin pies, or
1 - 10" pie. And it makes a pretty full pie at that!.

Bake the pie at 425 degrees F for 15 minutes. Then, trun the temperature down to 350 degrees F and bake for another 45 to 60 minutes, until a clean knife inserted into the center comes out clean.

Cool the pie and enjoy!!


Moving on...Pecan Pie.
I tend to use a lot of recipes from Paula Deen, so it's no surprise that I have this recipe courtesy of the Lady herself. You can find the original recipe here, though there is one difference between the internet recipe and the one found in her cookbook, the Lady and Sons Just Desserts. This pie is a variation on her Dark Rum Pecan Pie - also delicious!


Yields: 1 9-inch pie (6 to 8 servings)
Prep time: 10 minutes
Cook time: 35 minutes

Ingredients:
  • 1 cup sugar
  • 3 TBS butter, melted
  • 1/2 cup dark corn syrup
  • 3 large eggs, beaten
  • 1 1/2 to 2 cups pecan halves (I actually use 2 - 2 1/2 cups myself)
  • 2 TBS good-quality bourbon (though in the cookbook it says 1 TBS is for the pie, and 1 for the cook - using 2 TBS will result in a slightly runny pie)
  • 1 9-inch deep-dish pie shell, unbaked
Preheat the oven to 375 degrees F.

In a medium bowl, stir together the sugar and melted butter. Add the corn syrup, eggs, pecans and bourbon. Stir until all the ingredients are combined. Pour the mixture into an unbaked pie shell, and place on a heavy-duty cookie sheet. (Note: I usually feel there aren't enough pecans at this point and usually add a few more to the top. You really can't have enough pecans in a pecan pie, can you?). Bake for 10 minutes. Lower the oven temperature to 350 degrees F, and continue to bake an additional 25 minutes, or until pie is set. Remove from oven and cool on a wire rack.

Okay. So, you've got your fresh pumpkin pie filling, you've got your pecan pie filling - now the PIE CRUST!

Double-Crust Pie Dough (courtesy of The America's Test Kitchen Family Cookbook)

Yields: enough crust for 2-single crust 9" pies, or 1-double crust 9" pie

Prep time: 5 minutes
Total time: 1 hour 15 minutes (includes 1 hour of chilling time)

Ingredients:
  • 2 1/2 cups all-purpose flour, plus extra for rolling out the dough
  • 2 TBS sugar
  • 1 tsp salt
  • 8 TBS vegetable shortening, cut into 1/2-inch pieces and chilled
  • 12 TBS (1 1/2 sticks) unsalted butter, cut into 1/4-inch pieces and chilled
  • 6 to 8 TBS ice water
There are two methods here - one is using a food processor, the other is a hand-mixing method. I've only done this by hand.

  1. Food processor method: Process the flour, sugar, and salt in a food processor until combined. Scatter the shortening over the top & process until the mixture has the texture of coarse sand, about 10 seconds. Scatter the butter pieces over the top and, using short pulses, process the mixture until it resembles coarse crumbs, about 10 pulses. Transfer to a bowl.
  2. Hand-Mixing method: Freeze the butter in its stick for until very firm. Whisk together the flour, salt, and sugar and press into the flour, using a fork. Grate the frozen butter on the large holes of a box grater into the flour mixture, then cut the mixture together, using two butter knives or a pastry blender, until the mixture resembles coarse crumbs.
  3. Continue for both methods: Sprinkle 6 tablespoons of ice water over the mixture. Press the dough together, using a stiff rubber spatula until the dough sticks together. If the dough does not come together, stir in the remaining water, 1 tablespoon at a time, until it does.
  4. Divide the dough into two even pieces and flatten each into a 4-inch disk. Wrap the disks tightly in plastic wrap and refrigerate for 1 hour. Let the chilled dough soften slightly at room temperature before rolling it out and fitting it into a pie plate. (Note: I like to flour 2 pieces of wax paper and roll the dough out between them, it leads to easier clean-up).
TO MAKE AHEAD: The dough can be refrigerated, wrapped tightly in plastic wrap, for up
to 2 days or frozen for up to 2 months. Let the frozen dough thaw on the counter top until
malleable before rolling.

So...hopefully you enjoy these recipes from scratch. Enjoy & Happy Thanksgiving!!


Wednesday, November 25, 2009

After dinner butter mints

Over the weekend I made some cupcakes, which I neglected to blog about. That will be forthcoming after this holiday week. For now...an onslaught of holiday recipes!

One of my favorite things to eat over Thanksgiving (don't ask me why) are after dinner butter mints. For those of you unfamiliar: you know the pastel colored mints that are delicious and melt in your mouth? That's a butter mint. I always associate them with the holidays...because that's when my family gathers and we have such a thing.

After 7 years away from my parents for Thanksgiving (for various reasons), we decided to take the trip from NYC to Chicago for the holiday. My mom asked what I wanted to eat and what she needed to get - I immediately thought of butter mints. Then I thought...why buy them? I'm sure there is a recipe on the internet!

Thus...I came across this recipe. It's super easy, and you can make them any color you want...not just the pale yellow/pale green/pink variety that you can buy in the store.

Butter Mints:

Yield: Lots of mints
Time: About 30 - 45 minutes active, 24 hours resting before they are ready to share

9 1/2 cups powdered sugar (yes...you read that correctly folks!)
1/2 cup unsalted butter, softened
2/3 cup corn syrup
1 tsp salt
1 1/2 tsp peppermint extract
1/2 tsp vanilla extract
food coloring (your choice - I made orange & yellow for Thanksgiving. I used gel, but liquid or paste will work)

  1. In a large bowl, cut together sugar & butter with 2 knives or a pastry blender until butter is in large chunks. Add corn syrup, salt, peppermint & vanilla.
  2. Stir with a wooden spoon until mixture begins to come together, then work into a dough with your hands, kneading constantly until dough is smooth and uniform.
  3. Divide dough into two parts.
  4. Make a well at the center of each and put a small amount of food coloring in the well. Knead each ball of dough until the color is distributed uniformly.
  5. On large sheets of waxed paper in an area where you will rest your candy, roll dough between your hands into "snakes" a little larger in diameter than a pencil. Note: I actually did this on a cookie sheet. I don't really have anywhere I can let something sit undisturbed for 24 hours (oh to have the luxury!), and this allowed me to move the mints around to various locations without disturbing them.
  6. Once you have all the dough rolled, set a time for 10 minutes.
  7. When the timer goes off, begin cutting the snakes into little pillows. Start with the first ones you prepared.
  8. Allow them to set for 24 hours.
  9. Store in an airtight container or large Ziploc bag. Keep in mind that the mints are semi-soft, so protect them from being crushed.

Enjoy!

Sunday, November 15, 2009

Mexican Wedding Cookies


Or...butter + powdered sugar = delicious.

So, Matt's been bugging me to make these for awhile. It's a simple recipe with few ingredients...these tend to be my favorites in terms of recipes. Too many ingredients sometimes muddle the taste. If you have good ingredients, why not showcase them?

It's been probably a good two years since I've made these cookies. I couldn't remember why, I assumed it was just because these cookies are delicate and don't travel well. Much of my baking has to stand-up to the subway test (can I take them into work? Yes = good recipe, No = seldom made recipe). Our apartment isn't fantastic for entertaining, so delicate recipes tend not to be made often. What I realized when making them is I hadn't made them because they require hand shaping. I'm a lazy baker and prefer drop cookies, or cookie cutter cookies. I'm not gonna lie. But...Matt wanted them, so I made them.

Of course...for Matt's sake I was incredibly messy in my baking since he was home. No one has ever (or will ever) accuse me of keeping my workspace clean. However, I managed to drop my container of flour (ie...the top came off when I was taking it from the shelf) and got flour all over the kitchen. Always an adventure...

Anyway, without further ado:

Mexican Wedding Cookies
adapted from Paul Deen
Paula Deen & Friends Cookbook

Prep time: approx 15 mins
Baking time: 45 mins

Total time: about 1 hour + cooling
Makes about 2 1/2 dzn cookies

1 cup (2 sticks) butter, at room temperature

1/2 cup confectioners' sugar, plus more for coating baked cookies
1 tsp vanilla extract
1 3/4 cups all-purpose flour, plus more for dusting hands

1 cup pecans, chopped into ver small pieces


1. Preheat oven to 275 degrees F. Line cookie sheets with parchment paper.


2. Using an electric mixer at low speed, cream the butter and confectioners' sugar until smooth. Beat in the vanilla. At low speed, gradually add the flour. Mix in the pecans with a spatual.

3. With floured hands, take out about 1 TBS of dough and shape it into a crescent. Continue to dust hands with flour as you make more cook
ies. Place them 1 inch apart from one another on prepared cookie sheets. Bake for 45 minutes.

4. Roll in additional confectioners' sugar while still warm. Cook completely on wire racks and store in airtight tins. So...a few adjustments this time around, and we will see how they go.
  • I was running low on pecans (a travesty, I know) so I used about 1/2 pecans & 1/2 walnuts. I use these nuts interchangeably a lot anyway. I tend to like pecans more then walnuts and use them to punch up recipes that call for walnuts. The walnuts don't show in the taste, but there is a bit of a walnut-ty after taste. I do prefer the pecans, but think the walnuts aren't a bad way to go.
  • I'm generous with my vanilla use.
Enjoy!

Saturday, November 14, 2009

Homemade Vanilla Extract (Can you say....holiday gifts??)

A few moths ago (read: last January) I stumbled upon a recipe for homemade vanilla extract. Can you imagine my excitement? I am a bit of a vanilla nut...and I go through tons of vanilla extract with all my baking. And, I find much of the vanilla extract out there to not be up to my standard of taste. So, I've been biding my time since finding this recipe.

Finally, I got online the other day and ordered my vanilla beans. There are many sites out there that sell vanilla beans - and yes, the beans can be expensive. However, I've found that you can order "Extract Beans" which are for just this purpose. They are a bit dryer and uglier then the vanilla beans you will find at say, the Whole Foods. But apparently they are up to the job of being infused into extract.

The process of vanilla extract making is really quite simple, or so it seems. I guess the true test will be in 4-6 weeks when the extract is ready for tasting. Essentially vanilla beans + alcohol = vanilla extract. I'm starting with one version of the recipe I found, which uses vodka. I am interested (if this turns out) into possibly experimenting with other types of alcohol just to see if it still makes a viable vanilla. (and yes...I now have a lot of vanilla beans.)

Okay...again, pictures to come but here is the basic process:

(adapted from this recipe)

  1. Get vanilla beans & vodka. The vodka should be of good enough quality that it has a pretty neutral taste/lack of taste.
  2. Get bottles. This recipe creates it in a 1-quart bottle. I'm hoping to use these for gifts, so am starting with 4 oz. bottles. However, I have a good deal more vanilla beans then bottles at the moment because I'm having a hard time finding a local bottle source and shipping is quite pricey!
  3. Cut vanilla beans in half & length-wise. For a 4 oz bottle put approx. 2 beans per bottle.
  4. Using a funnel, pour 1/2 cup of vodka per 4 oz bottle.
  5. Cap bottle. Shake vigorously.
  6. Store in a cool, dark place for 4 - 6 weeks. Shake vigrorously a few times per week.
  7. This will continue to get more vanilla-y as it ages.
So...I guess in 4-6 weeks I will report back with the progress of this experiment!

Fingers crossed...

Thursday, November 12, 2009

Red Velvet Cupcakes


One of my recent favorites to bake is cupcakes. I went through a whole cupcake phase earlier this year, and as I re-visit each cupcake I'll start to post them on here.

Now...I used to be a skeptic when it came to red velvet. I don't really know, I guess part of it was the uncertainty of what red velvet was. I mean...it's kind of a supernatural color. And I'm a huge chocolate girl...so that also was a demerit for the red velvet. Then..a couple years ago I took the plunge and tried a piece of red velvet cake and found out what I was missing! Red velvet I feel like is an often misunderstood cake flavor. It's a class all of it's own. I like that. And...as a redhead I feel obligated to enjoy things of the red variety.

So with that, I delved into trying red velvet cupcakes earlier this year. Because why not? In a way this has become my signature cupcake. It's a nice, moist cupcake with a (not too) sweet cream cheese frosting. (Side note: Amy's Bread in NYC makes a nice red velvet cupcake but with a buttercream frosting...). I have cream cheese issues, which I'm slowly getting over - but really do like this cream cheese frosting! These were some of the first items that I've sold, and also a standard housewarming/birthday present for many of my friends. Today I completed a batch for a friends birthday this evening.

I have photos documenting the adventure which I will post later. Somehow, in cleaning the apartment the other day, I "temporarily relocated" the cable to download pics from camera to computer.

So...red velvet cupcakes.

Fairly standard. I mostly follow the below recipe.

Red Velvet Cupcakes with Cream Cheese Frosting

Recipe courtesy Paula Deen, 2007 & the Food Network

  • Prep Time: 20 min
  • Cook Time: 20 min
  • Level: Easy
  • Serves:
    24 frosted cupcakes (medium size cupcakes)

    Ingredients

    • 2 1/2 cups all-purpose flour
    • 1 1/2 cups sugar
    • 1 teaspoon baking soda
    • 1 teaspoon salt
    • 1 teaspoon cocoa powder
    • 1 1/2 cups vegetable oil
    • 1 cup buttermilk, room temperature
    • 2 large eggs, room temperature
    • 2 tablespoons red food coloring
    • 1 teaspoon white distilled vinegar
    • 1 teaspoon vanilla extract

    For the Cream Cheese Frosting: And filling if you choose to fill them! More below on that...

    • 1 pound cream cheese, softened
    • 2 sticks butter, softened
    • 1 teaspoon vanilla extract
    • 4 cups sifted confectioners' sugar
    • Chopped pecans and fresh raspberries or strawberries, for garnish (Since I fill my cupcakes I actually garnish with crumbs from the cored cupcakes instead of the suggested garnish)

    Directions

    Preheat the oven to 350 degrees F. Line 2 (12-cup) muffin pans with cupcake papers.

    In a medium mixing bowl, sift together the flour, sugar, baking soda, salt, and cocoa powder. In a large bowl gently beat together the oil, buttermilk, eggs, food coloring, vinegar, and vanilla with a handheld electric mixer. Add the sifted dry ingredients to the wet and mix until smooth and thoroughly combined.


    Divide the batter evenly among the cupcake tins about 2/3 filled. Bake in oven for about 20 to 22 minutes, turning the pans once, half way through. Test the cupcakes with a toothpick for doneness. Remove from oven and cool completely before frosting.


    For the Cream Cheese Frosting:

    In a large mixing bowl, beat the cream cheese, butter and vanilla together until smooth. Add the sugar and on low speed, beat until incorporated. Increase the speed to high and mix until very light and fluffy.

    Garnish with chopped pecans and a fresh raspberry or strawberry.

    Cook's Note: Frost the cupcakes with a butter knife or pipe it on with a big star tip.


    A few tweaks that I make:

    • I think there is too much oil. Often times when there is oil in a baking recipe I feel like it's too much - thus, I used 1 1/3 cups of oil.
    • I also ALWAYS add some additional vanilla. Always. I love vanilla. Soon there will be a post about making your own vanilla...hopefully it will work!

    A few other notes:

    • I am all about filled cupcakes. When I found myself with some...extra free time I decided to figure out how to fill my own cupcakes. So, I tried a few methods listed online. One of the primary listed methods is referred to as the "cone method". I hate the cone method. The theory is you take a paring knife and cut out a small cone from the middle of the cupcake. I find it messy, time consuming and just kind of annoying. I went out and got an extra piping tip with a nice size whole, stick that in the middle of the cupcake and core the center. It works for me.
    • Frosting: If you've never frosted a cupcake with a piping bag I suggest you go out to the store now and get a piping bag (12" or 14" is a good mid-size, I have an 8" which is good for some fillings but too small for frosting and I use a 16" or 18" when actually frosting cupcakes) and some different tips and give it a go. It makes the frosting of cupcakes a much quicker and easier process.


    Enjoy!!

    Wednesday, November 11, 2009

    Fall is in the Air! Pumpkin Spice Scones


    You may not know this about me...but I love fall. It's my favorite season, followed very closely by spring. Something about the transitions..I just love it!

    This fall I've embraced the various seasonal foods. I'll take the next couple of days to catch you up to what's been in my kitchen. But let's start with what I made most recently. We just had a house-guest. I feel that whenever possible, fresh baked goods should await a house-guest. It's just how I was raised. And this was a special house-guest, it was Matt's best friend Richard. He was in town so the boys could attend WhiskyFest NYC. (side note...if any of you are interested in whisky check out Matt's blog http://whiskeyapostle.com)

    So...in honor of fall, and Richard, I made some pumpkin scones. Now, I'm not really a scone girl. I don't know if it's the taste or the texture or if it's just a mental block. There's something about the word scone that sets me a bit on edge. But we were just at a fantastic b&b upstate (Creek Locks Bed & Breakfast) that had scones one morning for breakfast, so I guess scones were on the brain. And I've been eating as much pumpkin and butternut squash as I can get my hands on lately, so...I decided to scone it up. I think part of the reasoning for this was a somewhat sub-par pumpkin bread I made last week.

    I'm totally scavenging this recipe from another cooking blog, so think what you will of me. But below you will find the recipe for Pumpkin Spice Scones. If you want a more thorough accounting of the process went to to make these scones, then please feel free to visit the other blog - it's quite interesting! I somewhat followed the recipe. I added a little more pumpkin then called for, and that was about it. As previously stated...I love pumpkin.


    Courtesy of Pinch My Salt
    (This recipe takes about 15 minutes to come together and 15-20 minutes to bake)
    (Makes 8 scones)

    Pumpkin Spice Scones
    * 1 C. all purpose flour
    * 1 C. cake flour
    * 1 1/2 t. baking powder
    * 1/2 t. salt
    * 1/2 t. ground cinnamon
    * 1/2 t. ground nutmeg
    * 1/4 t. ground allspice
    * 1/4 t. ground ginger
    * 6 T. unsalted butter
    * 1/2 C. raisins (optional)
    * 1/3 C. pumpkin puree
    * 1/3 C. heavy cream
    * 6 T. brown sugar
    * 1 t. vanilla

    Plus ingredients for icing (see below)

    * 1. Preheat oven to 425 degrees. Get out a baking sheet and line with parchment paper (not required but makes cleanup easy!).

    1a. Cut the butter into small pieces, put it in a small bowl and put it back in the refrigerator.

    1b. In a medium bowl, combine both flours, baking powder, salt, and all spices. Whisk together well. Place bowl in freezer (refrigerator is fine if you have no room in freezer).

    * 2. In a separate bowl, combine pumpkin, heavy cream, brown sugar, and vanilla. Whisk together well. Put this bowl in freezer (or refrigerator) and take the other bowl back out.

    2a. Get the butter pieces out of the fridge and dump them into the bowl with the flour mixture. Cut the butter into the flour using a pastry blender or rub it in with your fingertips until it resembles coarse crumbs. Stir in the raisins if you are using them.

    * 3. Get the liquid mixture out of the freezer and pour into the flour mixture all at once. Stir with a wooden spoon until everything is just moistened. The dough will be very crumbly, this is the way it should be.

    3a. Turn the mixture out onto the counter and push the pile together with your hands. It should stick together fairly well. Knead it just a couple of times until everything is together. Don’t knead it too much or the dough will get too sticky.

    * 4. Pat the dough out into a rough circle, 3/4 to 1 inch thick. Cut it like a pie into 8 pieces. Place pieces on the baking sheet so that they are not touching.

    4a. Bake scones for about 15 minutes at 425 degrees. They should be light brown on the bottom, the tops will darken as they cool.

    * Icing:

    - For ginger molasses icing:
    *Stir together 1 C. powdered sugar, 1 T. molasses, 1-2 T. milk, and 1/4 – 1/2 t. ground ginger (to taste). Adjust the
    amount of sugar or milk to make the icing the consistency you want. It should be pretty thick.
    - For cinnamon icing:
    *Stir together 1 C. powdered sugar, 2 T. milk, 1/4 – 1/2 t. cinnamon (to taste). Again, adjust amounts to change
    consistency. Icing can be brushed on or drizzled.


    Now, this recipe has two options: with raisins & without, and thus two frosting options. I went sans fruit (the ill-fated pumpkin bread last week had dried cranberries and I just wasn't having it) and the suggested molasses-ginger icing. The icing was divine. I made the scones/frosting the night before and I feel like the ginger flavor intensified slightly overnight, but not in a way that made it overpowering. It would make me nervous to go too heavy on the ginger however. I may or may not have overmixed my scones slightly, as the dough was somewhat sticky when I got to transferring it to the baking pan. However, this gave it a surprisingly nice muffin texture.

    So there you have it...perfect for any fall morning sunny and warm or dreary and drizzly.


    Enjoy!!

    Baking for the under employed...

    So...it's come to my attention that I should have a blog. A baking blog. Obviously...what else would I blog about? I know about 2 things...stage managing and baking. I've been doing more of one than the other lately. I love baking. I'm not a cook. I don't like to measure things exactly. But it works for me. I don't know why it works for me and not others...but it does.

    That said..I LOVE to bake. I don't particularly care for cooking. Occasionally, you will see me post about cooking. I do it because I cannot live on baked goods alone. I haven't tried...I'd like to try perhaps, but I don't think it would be good for the size of my waist.

    There you have it. That's what this blog will be. If there are recipes you are interested in me trying, give a shout. Hopefully these will mostly be successes, but I imagine there will be some disaster stories that will show you I'm just a regular gal in the kitchen.

    I also have been toying with the idea of going to school to get my certificate of pastry, but do I want to be a chef or a cook? These are the ideals I struggle with in my mind while whipping up something in the kitchen. Do I want to weigh everything? Am I okay with approximate measures? If I did everything perfectly and spent $40,000 on an education would I be a better baker? Of course...it would be prettier, but does that make it better?

    I guess only time will tell...